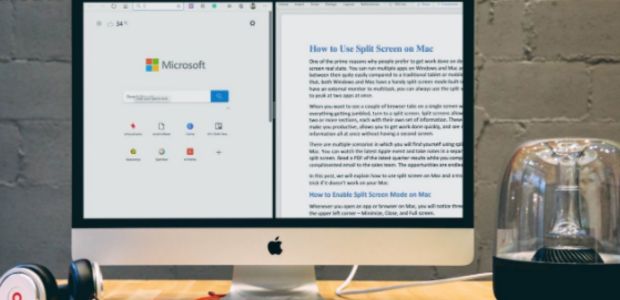
In the fast-paced digital age, multitasking has become an essential skill for many individuals, especially those working on a Mac. Juggling multiple applications and tasks simultaneously is a common scenario, and it often involves the challenge of managing numerous open windows on the desktop. However, there’s a streamlined solution to this predicament – the Split View feature on Mac. In this article, we’ll explore how to efficiently set up and utilize Split View to enhance your multitasking experience.

Setting Up Split View:
If you find yourself toggling between various tabs, browsers, and applications on your Mac, Split View can be a game-changer. To initiate Split View, follow these simple steps:
- Open Preferred Applications: Ensure that the applications and browsers you want to use in Split View are already open.
- Move Cursor to the Green Dot: Once your applications are open, move your cursor to the green dot located in the top-left corner of the window.
- Choose Left or Right Option: You’ll be presented with three options: “Enter Full Screen,” “Tile Window to Left of Screen,” and “Tile Window to Right of Screen.” Choose either the left or right option based on your preference.
- Enjoy Split View: The selected window will smoothly move to the designated side of the screen, and the other side will display the remaining open windows. Click on the desired window, and it will be tiled to the opposite side of your screen.
Using Split View:
Once you’ve set up Split View, you’ll notice a new desktop space created on your Mac. This innovative feature allows you to have multiple split views open simultaneously without closing other applications. To navigate between split views or access additional open windows, use these steps:
- Swipe or Use Mission Control: If you have other applications or windows open, swipe across your trackpad using three fingers or click “Mission Control” on your keyboard or control strip to access them.
- Switching Windows: To switch a window in Split View, move your cursor to the green dot again. Three new options will appear: “Replace Tiled Window,” “Move Window to Desktop,” and “Make Window Full Screen.” Opt for “Replace Tiled Window” to swap the current one with any others open on the original desktop.
Exiting Split View:
When you’re ready to exit Split View, follow these steps:
- Move Window to Desktop: Move your cursor to the green dot and select “Move Window to Desktop.”
- Close Final Window: Close the final window by clicking the green dot.
Conclusion:
Mastering multitasking on your Mac has never been easier with the Split View feature. By efficiently organizing your windows, you can seamlessly switch between applications, enhancing your productivity and workflow. Whether you’re a professional managing work tasks or a casual user navigating various interests, Split View is a powerful tool that brings order to the chaos of multitasking. Embrace the convenience and efficiency of Split View to make the most of your Mac experience.


